Tuesday, November 20, 2018

The Towering Living Room Fireplace

When we first toured our home and considered purchasing it, we had some concerns about the living room.

The space has some great features -- huge two story living room windows looking out over the pool deck out to the gorgeous golf course and the fireplace towering all the way to the ceiling. The upstairs landing also looks down into the space. It was very dramatic.

Remember, we purchased this home because of the view and the living room took advantage of every inch of that wonderful view.

However, the family room and kitchen were cut off and isolated from the living room. The owners had also installed a huge mirror covering the entire face of the fireplace.


Our concerns were how to frame those huge windows and soften them in the room and how to remove the mirror on the fireplace.  And, MOST important – how to open up the living room to the adjoining family room and kitchen. The concerns were valid. All three were complex.

Creating an opening to the kitchen and family room was our biggest concern. We have done this in other homes and knew it would change the whole feeling for the space. To make the space function an opening to the kitchen had to be created. It was critical. Hubby D and I spent a great deal of time figuring this out. Load bearing walls, wiring, removal of cabinets in the kitchen - was it worth it?

Once we determined that an opening could be created, we decided to go ahead and purchase the house.
Hubby D measured walls and searched for headers and studs to determine if an opening could be created. We returned to the house several times for more information and more measurements.
The wall was framed by the overhang from the upstairs landing and stairs. The wall measured 26' feet tall on the other side by the windows.
The opening to the family room ended up being the easiest part of the transformation of this room.  And, the opening was one of the best things we did for the entire project.

Originally there was only one door to the kitchen and family room. It was located in the hall past the dining room and opposite the laundry room.  During the time we were looking at properties to buy, when we arrived to look at this house, I had to stick my head in the front door and yell for the owners who would be in the family room and could not hear the door bell.

To travel from the front door to the family room, you had to walk all the way through the kitchen and down the hall.
The hall between the entry and the kitchen/family room ran by the dining room and the laundry room.
The arched opening at the very back of the kitchen was the only way to leave the family room and kitchen to go to the front of the home.
By opening the wall between the kitchen and the living room, we allowed circular movement for the entire living space. As I like to say, we set up good movement for a party. You always want a way for people to move around and bypass the kitchen where there is always a bottleneck. Why do we always gather in the kitchen?

The new opening between the living room and the kitchen/family room did change the house, how it felt and how it flowed.

Frist we had to remove all the existing equipment for the whole house sound system.  We replaced it with a new high tech system as we remodeled each room.
Cabinets came out first and then the wiring was terminated.
The central wiring was right in the middle of the new opening.
Here is the wall on the living room side before the opening was created.  It is also the wall I used to test paint colors. LOL

Then the framer cut the opening between the kitchen and the living room, put up a new header and secured the new frame to the foundation of the structure.

The minute they finished cutting the opening, I was so excited! It really worked to open up the space and it looked great!!!

Bolts run into the foundation to make sure the walls are secure in a hurricane.
The finished opening was curved to match other curved openings in the house. The edges of the opening were also rounded into a bull nose edge like the rest of edges in the house. Everyone who comes to the house says the opening appears original. This is what we wanted.

Here is the finished opening.
Next we tackled the fireplace. 
After the mirror above the fireplace was removed (it took 4 men to take it down), the face of the fireplace had to have the mirror glue scraped off and a new texture finish applied just like we had done in the dining room.

Flaking texture off the old bull nose edges ended up being a reoccurring problem throughout the entire house.  The old edges were metal and the aging plaster flaked off every time you touched them or applied a coat of paint.

Every edge where there was a bull nose we had large patches to make and new texture had to be applied. Redoing the edges was an unintended consequence of putting on new paint. Needless to say, I became good friends with our sheet rockers. They were an excellent crew and true artists when it came to textures.

The fireplace stones were our next challenge. The fireplace originally had a dark pink marble and we decided to replace it with our favorite, white Carrara Marble.
The original pink marble was a bit much for us.
We did not decorate our first Christmas in our new home -- only the fireplace was festive.  
Here the fireplace is being worked on but has not been painted yet. Already it is looking better.
 However in the end, both columns had to have new texture on all the bull nose edges.
Because of the high (26’) ceilings, updating the living room required the use of a scaffolding twice and probably should have had the use of scaffolding a third time when they removed the fireplace mirrors.

The first use of scaffolding was when we started painting. They moved the frame around carefully as the new tile floor had already been installed. I cringed every time I walked through the room as they were working. Painting the ceiling was very difficult even with the scaffolding.


Painting the ceilings became more of a major project after they put the first coat of paint on the very first one. Water stains began showing up in-between the texturing and the flat areas of the ceiling.

At first no one could figure out what was happening. The painter pulled in a specialist with SherwinWilliams to determine if perhaps the paint was at fault. It was determined the sheet rock was not sealed adequately and we had to seal all the ceilings with a lead based sealer. It turned out to be one of those terrible unintended consequences that had significant negative financial impact on the painting portion of the project budget.

The second time they brought in scaffolding was when the new drapery panels were installed to frame the large two story window.

When the living room was complete, we pulled out our carpets (rugs) from the Middle East and from our previous home in Virginia. We had been storing them in the master bedroom. LW helped carry them into the living room so we could spread them out. It reminded me of a rug flop in Bahrain. It was great fun.


LW had a really fun time rolling around all over the carpets. He was giggling and rolling. For me, it is a fantastic memory.


Our new custom rug arrived for the living room but apparently in transit a forklift poked a hole in it so it would have to be reordered (3 months).  UGH!


Our piano arrived and the wall glass art was installed.

The piano was a 4 man job to move into the house.
Wall glass art going up.
The finished living room is elegant and dramatic. You can look up to the second story landing and admire the iron rails as well.

I found just the perfect spot over the piano for my photo of the sun rising over the Arabian Sea in Bahrain.

I realize the trend today for house design is to have one living area with only one eating area. I just don't understand that. I love having a great entrance area that leads to a space where I know it is always orderly and beautiful. The kitchen and family room can be a mess - they often are, but the living room is still beautiful and a great escape.

BEFORE - the fireplace

AFTER

BEFORE - the wall leading to the kitchen
AFTER
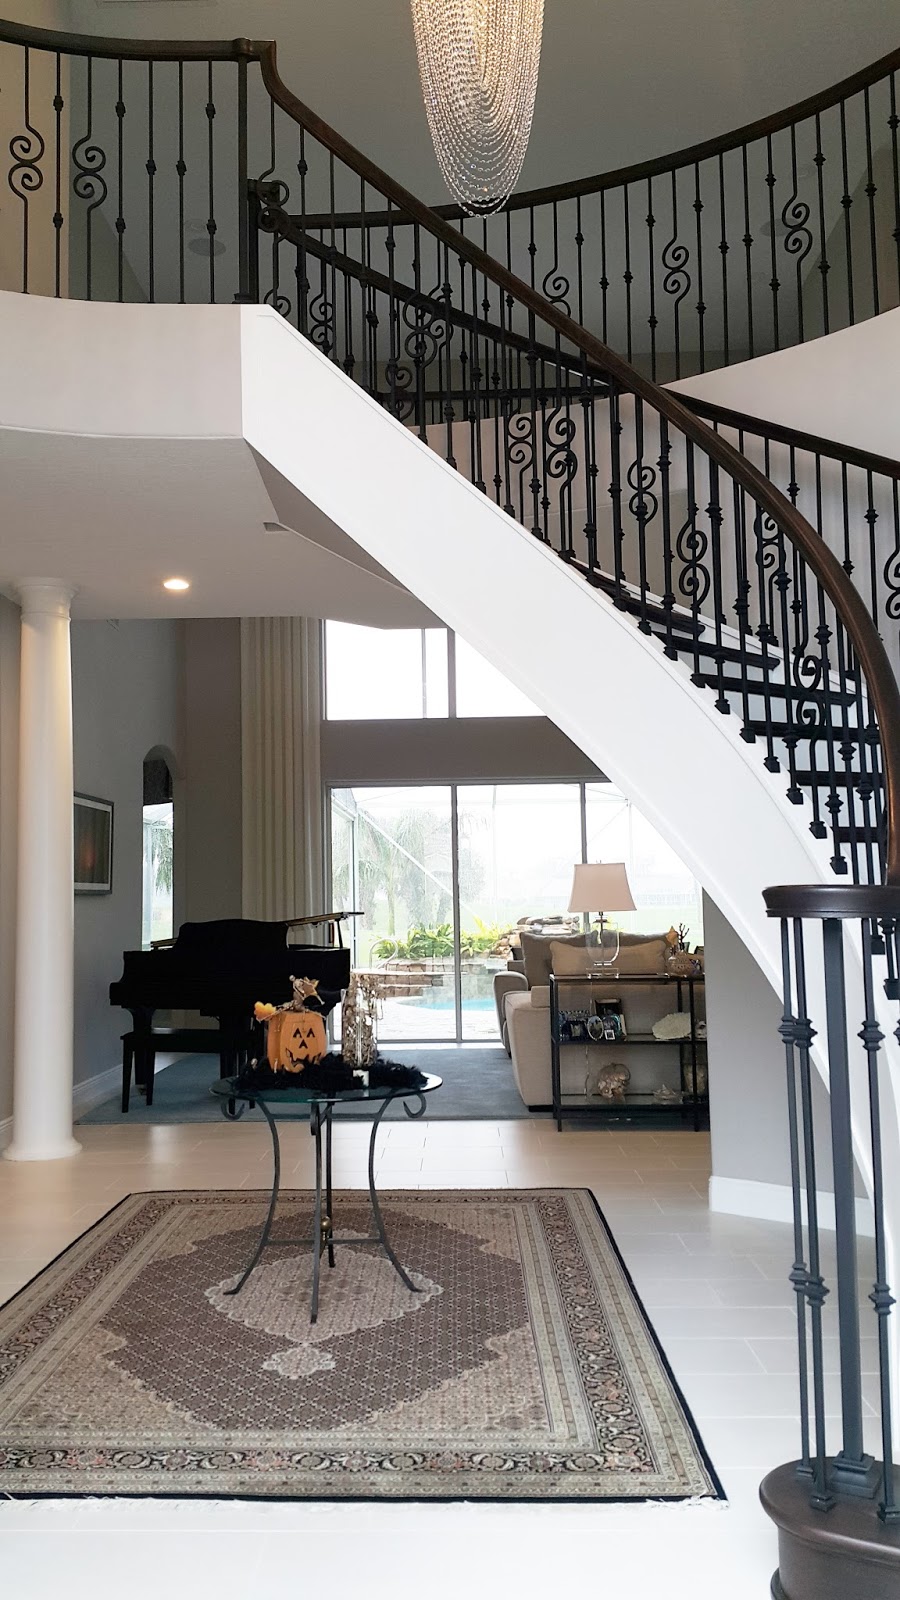
Here is the view looking into the living room from the kitchen.
BEFORE - the living room
AFTER
It was a great transformation and we really enjoy the space now.

Cheers,
Brenda

Saturday, September 1, 2018

The Great Artistic Endeavor

As you enter our home, there is a large two-story foyer, raised dining room and stairs leading to the second story landing where you will find two guest bedrooms with en suite bathrooms. 

Finishing the remodel of the foyer involved many of these areas because they are connected. We started from the floor up.

Replacing the flooring throughout the first floor.
Remodeling the dining room just off the foyer.
Remodeling the staircase and second floor landing.

Before we started removing the floor tiles, we removed all the mirrors in the house – there were two rooms with complete mirrored walls, the dining room and an exercise room off the kitchen that would become our office. The fireplace had a mirror that went up 20 feet and the bathrooms had mirrors covering walls above the sinks. We started in the dining room.

They managed to remove all the mirrors throughout the house without breaking any of them. 
After the mirrors were off the wall in the dining room, our dry wall company had to come in and remove the glue.  (Note the old light fixture in this photo.) The wall required a complete layer of new mud and texture. It was an unexpected job. One of those "unexpected consequences." LOL
Next the old floors came out.
Some of the floor tiles came up in big sheets.  It was an easy job to remove the tiles.
Removing the tiles was one of the messiest parts of the entire project but also one of the fastest.  The tiles were loose and came up very easily. They were done with the entire lower level of the house in under 4 hours.

We loved the new floors from the first moment they started laying the new tiles.
The new tiles were fabulous.
Next new LED lights were installed in the recess of the dining room ceiling.
We took down the old light and medallion.
And put up the new light.
After the cabinet bases were built across the back wall, we had the granite installed. It is a beautiful navy blue color. 
Finally the cabinets were finished by our custom cabinet maker, GM.
The iron-railing staircase took the longest to complete of any of the projects in the house, three full months. They were possibly the most complex project and definitely the most artistic. JP was our carpenter for the stairs. He is a true artist.

The original staircase reminded me of a deck rail, all wood. The stairs were covered in carpeting and there were plastic green plants on ledges everywhere.


I had bags and bags of green plastic plants.
The stairs were first removed and then built back one part at a time. It was quite a process.

After the old white posts and rails were removed, the holes were filled. Then our staircase carpenter, JP began work on the new hand rail. First it was glued, curved and cut into pieces. Then the treads were cut and placed. After all the wood was in place, it was stained and sealed. Finally after the wood was stained, JP came back and put all the iron in place and secured it. Whew!

I saved a small cross section of the railing so I could remember how complex the process was. I keep it on a shelf in the office.


JP's first step was to cut the layers of railing to correct lengths. He then glued the layers together and clamped them in place so they would dry with the exact curve of our staircase. It was a long and labor-intensive process.


Work was done one rail at a time.
I was very impressed with JP's clamping process.  It allowed him to match the curve angle of our stairs.  Each rail was a different angle and it took a long time for him to get it just right.

The clamps were actually visually interesting when they were in place. One day I took an entire series of photos of just the clamps.


When the rails were bent and in place, they were sanded - sanded and sanded again.

Our cabinet maker, GM did the staining of the rails, treads and the front door. They all match. Again, this was a multi layer process.

For several days, the entire foyer was sealed off with plastic.
Each tread and rail had 4 layers of stain and sealer.
After the staining was complete, JP started inserting the iron rails.

JP and I did a lot of "on site" design decisions. Here he is using his head and all of his fingers to hold rails so we can decide on the configuration of the final landing at the bottom of the staircase.
We tried several configurations before deciding on the design of the landing above the foyer.

The landing at the top of the stairs looks out over the living room as well as the foyer. The railing on the living room side was easy. JP might not say it was easy but compared to the other work, to me it looked easy. LOL
The curved iron post in our stair design is called "Nautilus."  I think it is ironic because I love the ocean so much. I  did not know that was the name of the design until JP told me.
The finished stairs are beautiful and very dramatic.
After the stairs were complete, it was time to have the light fixture changed. The original fixture was plastic made to look like crystal. We almost kept it as the style has made a comeback recently. In the end we decided to replace with some real crystal and we are very happy we did.

The light arrived in a large crate.
Once hung, it really is beautiful.
The foyer, dining room and staircase were some of the most difficult work in the entire house.  However the impact as you walk in the front door is exactly what we wanted. It really is stunning.

Dining room BEFORE
Dining room AFTER
Many people say they don't want a formal dining room. I realize the current trend is to only have one "eating" area however I personally love having a formal dining room. I just feel it makes those special dining opportunities more elegant and memorable. We do try to use our dining room often and it is very enjoyable. The wine coolers also come in handy.

Dining room cabinets along the wall also have wine cabinets on each end. 
The finished foyer is really wonderful. It is dramatic and still fun. The table in the center can change with the seasons giving me a place to be creative. The doors are the perfect size for pretty wreaths so the whole area is quite fun. Some of these photos were taken with Halloween decorations.

Foyer BEFORE
Foyer AFTER
The stairs are wonderful and we are very pleased with the effect.
The chandelier also shines!

Two of our rugs from the Middle East look really nice in the foyer.
At night the crystals in the foyer light twinkle.
So far everything was coming out the way we had hoped. And, to make it even better, we were still having fun!

Cheers,
Brenda